Friday, April 30, 2010

Be Prepared


I'm going to bed tonight with the above items on my night stand - - I've got a munchkin who has been rubbing his little ears all afternoon saying, "They itch in there!" As of bedtime, he's sniffing and snorting, so I suspect I may be in for a long night. Poor Griffer!

Tuesday, April 27, 2010

A Wonderful Weekend

My dear friend Jen came all the way to Idaho (from Maine) to visit me for a few days, and what a wonderful visit it was! I am so touched that she took time away from work, and her family, to come spend time with me. Jen is the best, and I have a feeling that she and I will continue to share adventures for years to come.

She arrived last Thursday, and my boys were immediately taken with her (they know a true "kid" person when they see one). Jen had only ever met Camden once, when he was one, and had never met Griffin.

Camden got right down to business in giving Jen a crash-course in all things Titanic. I'm not sure who talked her ear off more over the weekend - - Camden, or me!

On Friday, Camden had school, so Steve took us on a little sight-seeing drive into the hills. We nearly made it to the top of Squaw Butte, but got waylayed by snow and mud.


I loved having the opportunity to show Jen where I live. On Saturday, we left Steve in charge and headed for the Big City by ourselves.


We had a great time shopping, dining, and staying the night at Hotel 43. The next morning, we had a lovely breakfast at my new favorite bistro, La Vie En Rose. Yum!

Then, it was back home to drop the little boys off with their aunt and uncle so that we could visit some of Idaho's wonderful wineries. We thought ahead and brought along a handsome driver so we could really enjoy our wine:


First stop - - Koenig Distillery & Winery. The grounds are beautiful, the wine is fantastic...love this place! We pulled in behind a limo full of 20 or so people, so we had to elbow our way up to the wine bar, but held our own just fine.


Next, we headed over to Ste. Chapelle. The grounds are absolutely breathtaking. This particular winery has a great summer concert series, and it is fun to pack a picnic and head out to the country, sip wine, and listen to music.

On the way home, we made a pit stop at the Karcher Ranch Market for a quick snack, and ended up eating whoopie pies made by gentleman named Wayne, who, as it turns out, is from Maine. He makes a variety of delectable whoopie pies, and there is a little write up about the history of the Maine Whoopie pie, hanging next to the pile of whoopie pies on the counter by the cash register, just as it should be.

The next morning meant packing up and heading to Boise so that Jen could catch her flight home. Camden was not too happy, and had himself a good little cry before having to head off to school, but not before he asked Jen to walk him to his class. We attempted to have lunch with Steve but unfortunately that didn't work out because the Officer's Club was closed when we got there (sorry about that, Jennifer!).

This morning, while Griff and I were at the library, he took it upon himself to tell someone named Jennifer, who happened to be at the library also, that she "isn't the real Jen...the real Jen is on an airplane!" Needless to say, both of my little guys enjoyed their new friend to no end, and are looking forward to seeing her again in June, as am I. We miss you, Jen!

Monday, April 19, 2010

Kool-Aid Play Dough

I've always wanted to make homemade play dough, but somehow it has always just been easier to buy it. That is, until I finally got around to making some - - now I definitely believe it is easier (and more fun) to make our own. I'd heard about "Kool-Aid play dough", so when Griffin and I were grocery shopping last week, we bought some Kool-Aid and waited for inspiration to strike this morning.
All you will need is:

~ 1 cup flour

~1/4 cup salt

~2 Tbsp. vegetable oil

~1 Tbsp. cream of tartar

~1 packet of Kool-Aid

Measure all of the dry ingredients into a large bowl and stir together with a wire whisk. Add vegetable oil, and then slowly add 1/2 cup warm water. Stir together until dough forms. If too sticky, add more flour (I ended up adding about 1/4 cup more flour).


Not only is the texture of this play dough fabulous, but it smells soooo good! We will definitely be making this again and again.

Sunday, April 18, 2010

Sunday Morning

Wednesday, April 14, 2010

Homemade Laundry Detergent

The other day I told you about The Beehive Cottage, and another thing that caught my attention on this particular blog was the recipe for homemade laundry detergent. I've read about making laundry detergent many times before on the Internet, but finally decided to give it a try last night. The main motivator behind all of this would be this little cherub:

The Griffer has some pretty sensitive skin. I can't quite figure it out. I've tried all kinds of different detergents and fabric softeners, and while the "free" types do help, he still complains of itchy skin. So, I thought we'd give this a shot. Here are the ingredients:

The Borax and large box of baking soda are readily available in just about any store. I've read that you can find Pink Zote Soap at WalMart, although I found mine at a local Mexican market where I live. The Arm & Hammer Super Washing Soda proved a bit more challenging for me though - - I think I went to five different stores before I finally found some at WinCo. It is sold with the laundry detergent, usually right next to the Borax. Here is the recipe:

~ 4 lbs. Borax

~4 lbs. Baking Soda

~4 lbs. Arm & Hammer Super Washing Soda (the box is actually 3 lbs, 7 oz. - - close enough)

~ 1 1/3 bars of Pink Zote Soap

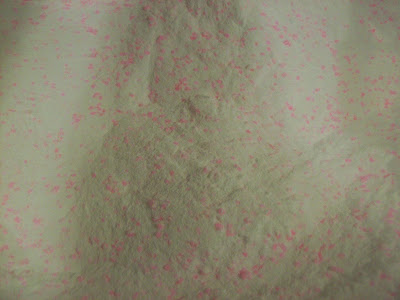
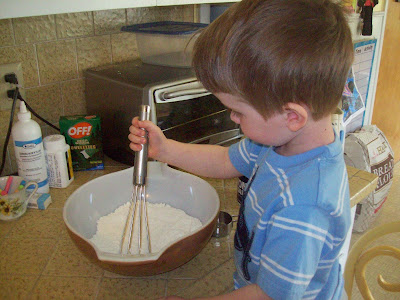
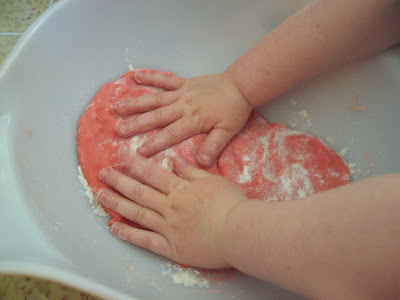
The first thing I did was cut the Zote Soap into big chunks, then grated it in my food processor. Don't worry, I washed my food processor really well afterwards. It's just soap, people. Here's what it looked like after grating:

After grating it, I put it back in the food processor with the chopping blade so that I could pulverize it. Didn't want the soap pieces this large.

There. Then, I took a random Rubbermade tote and poured everything into it so I would be able to mix it all together with my hands.

In the end, it makes about 12 lbs. of detergent. For a large load of laundry, you only need to use 2 tablespoons, so I think it will last for quite a while - - about 150 loads! The total cost for all of the ingredients was $11.65, so pretty economical, to boot. I'm actually going to see how long/how many loads of laundry I get out of this batch, because I'm a geek like that. Now, just store it in an airtight container.

If you freak out over low-sudsing detergent, then you probably won't like this. It doesn't suds up very much. It does clean your laundry though. My first load was some cleaning rags that didn't smell too good (ick), but came out of the wash smelling fresh and clean.

If you are worried about the soap dissolving (I was, because I wash most of my laundry in cold water), just set your washer to hot water long enough to to get a cup or so of water in the bottom of your washer, add the detergent, and give it a good swish. Then, continue filling with cold water. I did this and did not have any soap residue at the end of the wash cycle.

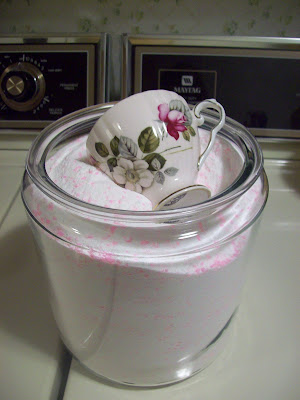
I liked MaryJane's idea of using a tea cup for a detergent scoop, so I had to steal that idea, because I'm a geek like that, too.
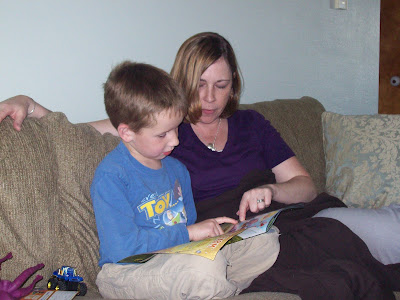
Friday, April 09, 2010

My Latest Obsession

You know how you look something up on the Internet, and somehow it leads you to another website or blog, and then to another, and at some point you can no longer remember how you stumbled upon something? Well, that happened to me last week. I think I was doing a little camping research for our upcoming camping trip in May, when I happened upon the neatest blog called The Beehive Cottage. It is chock-full of all kinds of vintage goodness, lovely pictures, and things that I love. The item that really caught my eye though was MaryJane's vintage trailer...oh my goodness, I love it!!

Photo from The Beehive Cottage

Please pay her blog a visit and check out the many posts about her trailer. Of course, now I am OBSESSED with vintage trailers, and more specifically, Sisters on the Fly. I would like nothing more than to find myself a fabulous 12' trailer and start joining in on the adventures. I found a neat website called Tin Can Tourist and have spent more time than I care to admit, looking at the classified ads for all of the beautiful restored trailers. So now, I just have to save my pennies, and maybe someday I will have my own little home-away-from-home!

Thursday, April 08, 2010

Sprucing Things Up, Part II: Drop Cloth Drapes

Here is our living room "before". Actually, if you look on the right-hand side of the picture, you can see some of the new paint - - I am really bad at remembering to take pictures before I start a project. See the walls? Boring! See the big, gold-framed picture of red flowers? I got that at a yard sale across the street, the weekend we moved in, because I had nothing to hang on that big, bare wall. I'm happy to say that picture is long gone now. Although the wall is now freshly painted, it is bare again, because I'm in the midst of obsessing about what to hang on that wall. First, I thought I'd arrange my mirror collection. Then, I wanted to do photos. Now, I'm kind of thinking a mix of mirrors and photos. Who knows. I'm sure I'll figure something out eventually.

This gives you a little idea of how the living room and dining room are one big area. When I was looking for paint, I was pretty sure I wanted something sage-y green. When I settled on a swatch, I flipped it over to find the name of the color was "Vintage Find", which let me know it was just the color I was looking for. Depending on the light, it sometimes looks green, sometimes, blue, and sometimes even grey. I just love it.

You'll notice in the first picture, that the front window just had sheers. There use to also be some very heavy-duty custom made drapes, but those met their demise when I decided to wash them, rather than follow the "dry clean only" instructions. Mind you, they were custom made somewhere around 1972, so I wasn't too broken up to see them go. Here are the drapes I wanted for my living room:

Photo: Pottery Barn
Linen drapes from Pottery Barn. However, at $179 a pop, that wasn't going to happen. The main reason being, I don't have that kind of money, but if I did, I cannot imagine spending it on drapes! Anyway, I was pretty certain I could still get the look I wanted, with a little help from my good friend, The Internet. Months ago, I'd read this post over at The Lettered Cottage. Ever since then, I've seen many, many versions of drop cloth drapes, and decided to give it a try. Now before you freak out about using painter's drop clothes for drapes, go ahead and Google them, and check out all of the great posts about them - - you'll be amazed!

My one bit of advice is this: Buy your drop clothes at WalMart. I followed the advice of others, and went to Lowes for mine.
I guess the thought was that the drop clothes from Lowe's were a bit heavier (they were) and that the coloring was better (it wasn't). The real problem was that the drop clothes were comprised of pieced-together canvas - - pieced together with big, ugly seams, mind you. Luckily, we needed a large drop cloth for an awning for the boys' sandbox, so they could still be used.

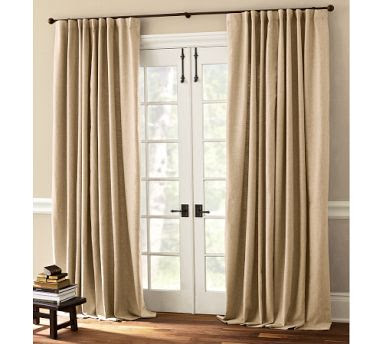
This is what you'll find at Walmart. $9.87 for a 6'x9' canvas drop cloth. They are fabulous because all of the edges have already been hemmed. No sewing required at all. Just throw them in the wash, dry them, then iron them, and they are ready to hang. I needed a new drapery rod as well, and was able to find just what I was looking for at Target, for a great price. The drapery clips came from WalMart - - they are 100% identical to the ones they sell at Target, but they cost $2.00 less per package.

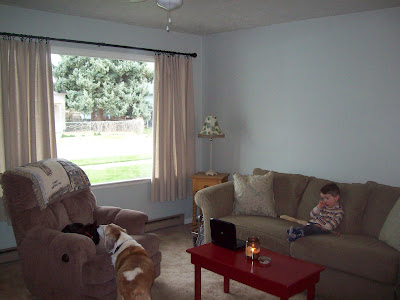
Here is the finished result. As you can see, I had to bribe Griffin with a video, so that I could write this blog post. You will also see Riley in this photo, doing what he does best, which is licking the cat...morning, noon, and night.

I just love how the drapes look. I love the texture, I love how the natural light filters through them, and I really love how inexpensive they were.


Wednesday, April 07, 2010

Sprucing Things Up

It has been almost 4 years since we moved into our current home. We purchased it from our next-door neighbors - - a couple in their 80's who had lived here for 35 years. I think my friend Terri described our house best, the first time she came to visit, when she said, "It kind of has a Grampa feel to it". In a nutshell, I think the last time this house got any kind of update was probably about 25 years ago -- it has a very distinctive Brady Bunch vibe going on. Anyway, I'm finally getting around to making some changes.

The one room that has bugged me the most has been the living room/dining room. It is one big space, all walls painted a flat off-white. In my opinion, off white is b-o-r-i-n-g, and flat paint just does not mix well with grubby little boys. Besides that, there were just many things in the room that simply detracted from it reaching its full potential.

So, before getting started, I had to stop and think about what needed changing the most. The walls definitely needed color. The drapes had to go. Dated wood stove needed to be removed. Ginormous 1970's mirror over the mantle...bye-bye! The ceiling fan? Well, it needed to be dragged to a remote location and burned. See for yourself:

Behold, the World's Most Hideous Ceiling Fan
I'm happy to report that the ceiling fan has been removed. We found exactly what we were looking for in a replacement at Home Depot, for less than $20.00. The problem? When Steve removed the old fan from the ceiling, it revealed some sketchy/scary wiring that he wasn't about to mess with. So, here is what the living room ceiling looks like right now:


The good news is, the electrician will be stopping by this afternoon, so we should be back in business pretty soon.
Then, there are the things that I'd like to change, but that will just have to wait for now: New carpeting. New furniture. Refinished hardwood. New chandelier. These things will come in time, but in the meantime, I'm making all kinds of changes, without breaking the bank. It can be done!
Come back tomorrow and we'll talk drapes, paint, and random decor.

Monday, April 05, 2010

Bringing Spring Inside

Remember my "birdie branch"?

Well, it was time for a little refreshing for spring. So, I stopped at Hobby Lobby for some artificial cherry blossoms (they were all out), but instead came home with this:

Close enough! I just popped the individual blossoms off, fired up my trusty glue gun, and voila! A spring branch to brighten my home.

Thanks for the inspiration, Jennifer Juniper!

Blog Widget by LinkWithin